We always wish to have the same feature on our computer/laptop. If you are using Windows 10 or Windows 11, you can enable the predictive text and autocorrect on your PC. The keyboard feature is introduced in Windows 10, and it was available even on the new Windows 11. Enabling predictive text and autocorrect is also pretty easy on Windows 10. Hence, in this article, we will share a detailed guide on how to enable predictive text and autocorrect features on Windows 10. The process is pretty easy, you just need to implement the simple steps shared below. Let’s check out. Also read: How to Update Windows 11
Steps to Enable Predictive Text & Autocorrect in Windows 10 or 11
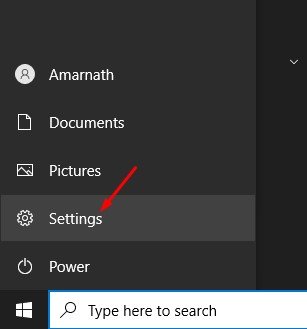
If you enable this feature, Windows 10 will show you text suggestions as you type. Here’s how to enable Predictive text in Windows 10. Important: The feature works well with a hardware keyboard. The method shared below will enable the Predictive text & autocorrect feature only on the hardware keyboard. Step 1. First of all, click on the Windows 10 Start button and select ‘Settings.’
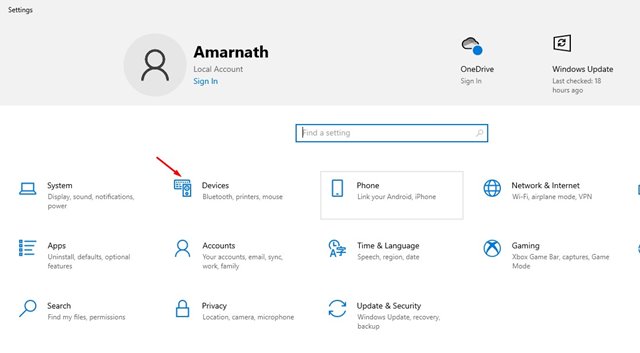
Step 2. On the Settings page, click on the ‘Devices’ option.
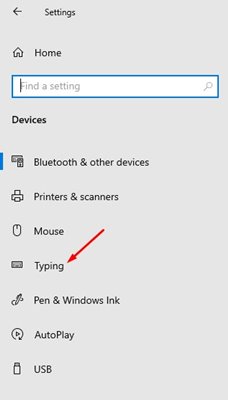
Step 3. On the left pane, click on the ‘Typing‘ option.
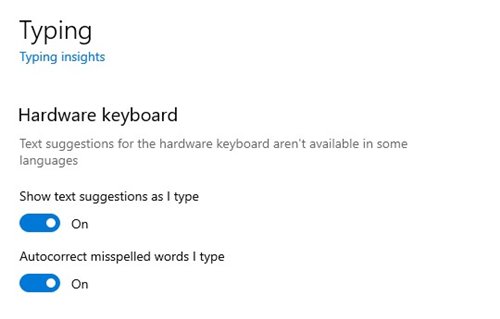
Step 4. Now under the Hardware keyboard option, enable the two options:
Show Text suggestions as I type Autocorrect misspelled words I type
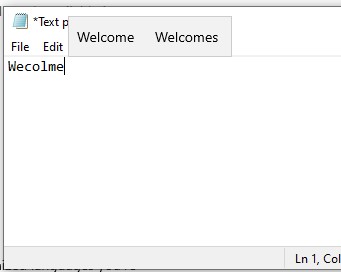
Step 5. Now, whenever you type on a text editor, Windows 10 will show you text suggestions.
That’s it! You are done. This is how you can enable predictive text and autocorrect in Windows 10. If you wish to disable the feature, turn off the options you enabled in Step 4. So, this guide is all about how to enable predictive text and autocorrect in Windows 10 computers. I hope this article helped you! Please share it with your friends also. If you have any doubts related to this, let us know in the comment box below.
